http://karnaintrack.blogspot.co.uk -
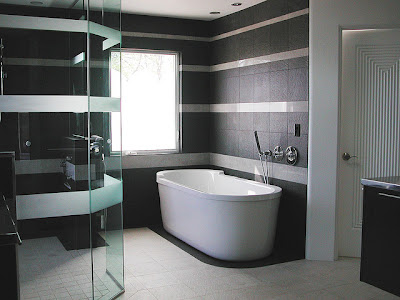
Summer is a great time to revamp your bathroom into a relaxing haven; perfect for chilling in after a hot day. One of the latest trends in interior design is to use stripes, which works well in any sized bathroom so it's a look that works for everyone.
Horizontal or Vertical Stripes?
Whilst vertical stripes have been a common feature in living rooms, hallways, and kitchens for years, the use of striped bathroom walls has not been popular in bathrooms.
Bathrooms are not friendly to wallpaper, because of the humidity and moisture levels, which is why we tend to prefer tiles and paint to decorate our bathrooms - this is almost certainly why stripes have rarely made it into this room.
The use of stripes in a bathroom should not be overlooked however, as they not only provide added pattern and interest to the walls (without being too fussy), they can also create visual illusions.
Vertical stripes are ideal if you want to create the illusion of a taller, more grand looking bathroom. Ideally you would only use this on one wall, or one section of wall in the bathroom - a bathroom should be a restful haven, not somewhere to inflict headaches with the overuse of stripes on every wall.
Horizontal stripes are one of the hottest current trends for decorating, and are ideally suited to small or narrow bathrooms, that you want to make feel wider and more spacious. Again, using it on one, or maybe two walls in the bathroom would be sufficient, and to maintain a more modern, restful feel should be wide stripes, or of varying widths, rather than narrow, or candy stripes.
How to Paint Stripes
Striped painted bathroom walls are the easiest way to get the look of stripes in the smallest room of the house, you just need:
- Tape Measure
- Spirit Level (preferably large with indicated measurements like a ruler)
- Masking Tape
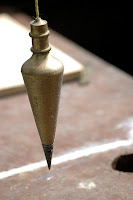
- Plumb line (for vertical stripes)
- Bathroom paint (regular emulsion paint cannot withstand moisture in a bathroom and will peel off the walls)
- Mark with a pencil around the top of the wall, where you want your stripes to go.
- Hang a plumb line from your first mark and "ping the string" of the plumb line to leave a perfect vertical line - no spirit level needed.
- Continue around the room.
For painting horizontal stripes
- Armed with a large spirit level make your first pencil mark, ensuring that it is straight by focusing on the bubble in the spirit level.
- Draw lightly across the spirit level. Move your spirit level across the wall, making sure you have a good overlap with your pencil mark, and make another mark in line with this one.
- You could also try measuring your points from either the floor up, or the ceiling down, and then joining these marks up using the spirit level.
For vertical or horizontal striped painted walls, the next step is the same.
Mask off each area with masking tape, and paint your stripes. Remove the masking tape whilst the paint is tacky - not when it's wet as the color can bleed, and not when it's dry as your paint is likely to flake off.
Other Ways of Using Stripes in the Bathroom
Of course striped bathroom walls don't have to be just horizontal or vertical. You could also try painting:
- Diagonals into the corner of the room.
- Mask off squares or circles and paint stripes within them.
- Use one small section as a focal point - maybe off to the side of center.
- Freehand and irregular stripes for a more relaxed feel.
- Use tiles to create the lines, if you don't have a steady hand. Either as a few strips, or just as a splash back.
- Add small mirrors, or mirrored tiles to create stripes and the feeling of space - metallics are also a hot decorating trend, so you are incorporating two trends into one.
Whichever way you choose to create striped bathroom walls, just remember to use it in one area, or space the stripes out - you want to create the feeling of a modern sanctuary, not migraine central!
Image Credits:
Bright horizontal stripes - http://www.flickr.com/photos/ooh_food/3274469891/sizes/m/in/photostream/


0 komentar:
Posting Komentar